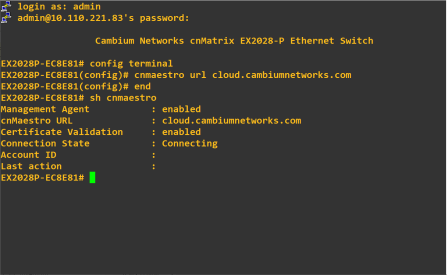
You can onboard cnMatrix through device CLI and via device UI also.
Use the following command to onboard cnMatrix device connection to cnMaestro:
cnMatrix(config) # cnMaestro url cloud.cambiumnetworks.com
Use the following command to view the status of cnMatrix device connection to cnMaestro:
cnMatrix(config) # show cnMaestro
In the cnMatrix device UI perform as follows:
| 1. | Navigate to |
| 2. | Enter the details and click Apply. |
![]()
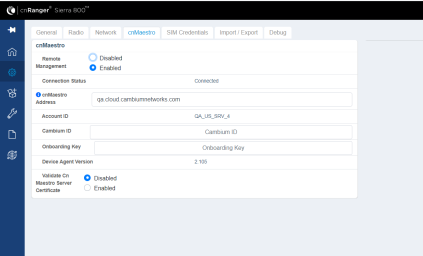
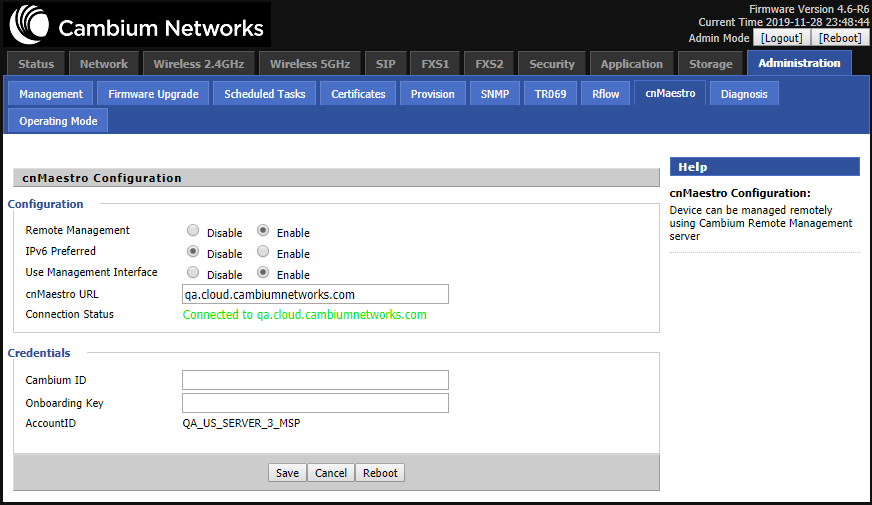
To view the status of Sierra 800 and Tyndall 101 connection to cnMaestro.
| 1. | Navigate to Configuration > cnMaestro. |
| 2. | Under cnMaestro section, enter the URL in the cnMaestro Address. |
| 3. | Click Save. |
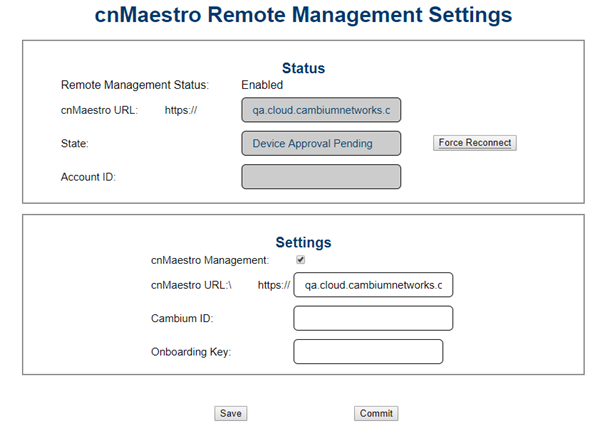
| 1. | Navigate to Configuration > cnMaestro. |
| 2. | Under cnMaestro section, enter the URL in the cnMaestro URL. |
| 3. | Click Save. |
.png)
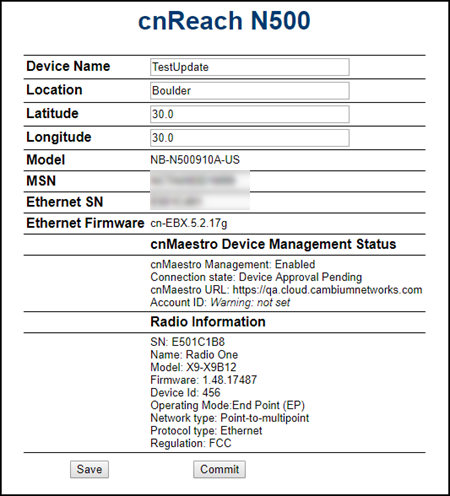
In the cnReach device UI,
| 1. | Navigate to . |
| 2. | Scroll to . |
| 3. | Select and enter your Cambium ID and the user’s Onboarding Password. |
| 4. | Navigate to to view the status of the cnReach device connection to cnMaestro. |
Figure 1 Onboarding cnReach through UI
To view the status of the cnReach connection in the cnMaestro:
Figure 2 Viewing the cnReach connection to cnMaestro
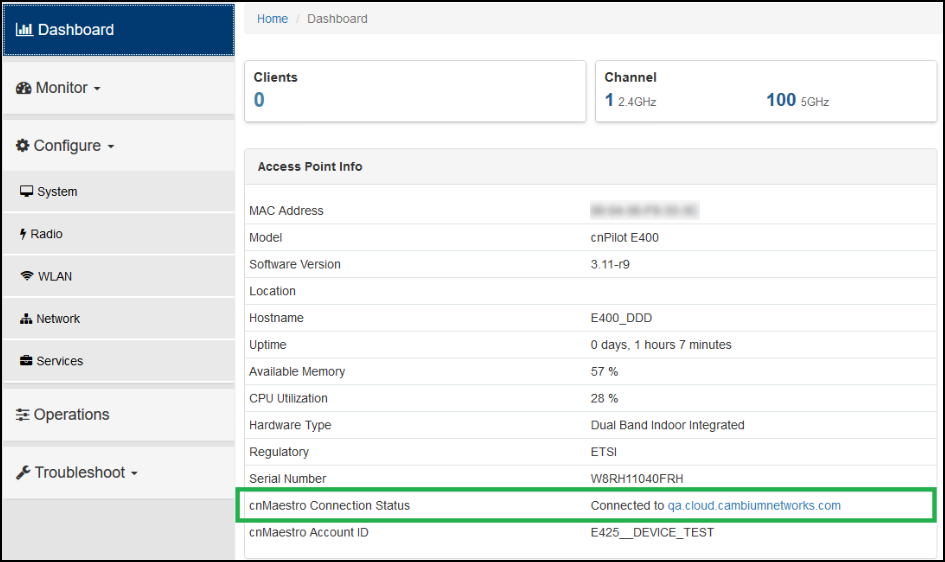
To view the status of the cnPilot R-Series device connection to cnMaestro:
Figure 3 Viewing the cnPilot R-Series device connection
The following OIDs can be configured:
| | cambium_id |
| | cambium_token |
| | cns_staic_url |
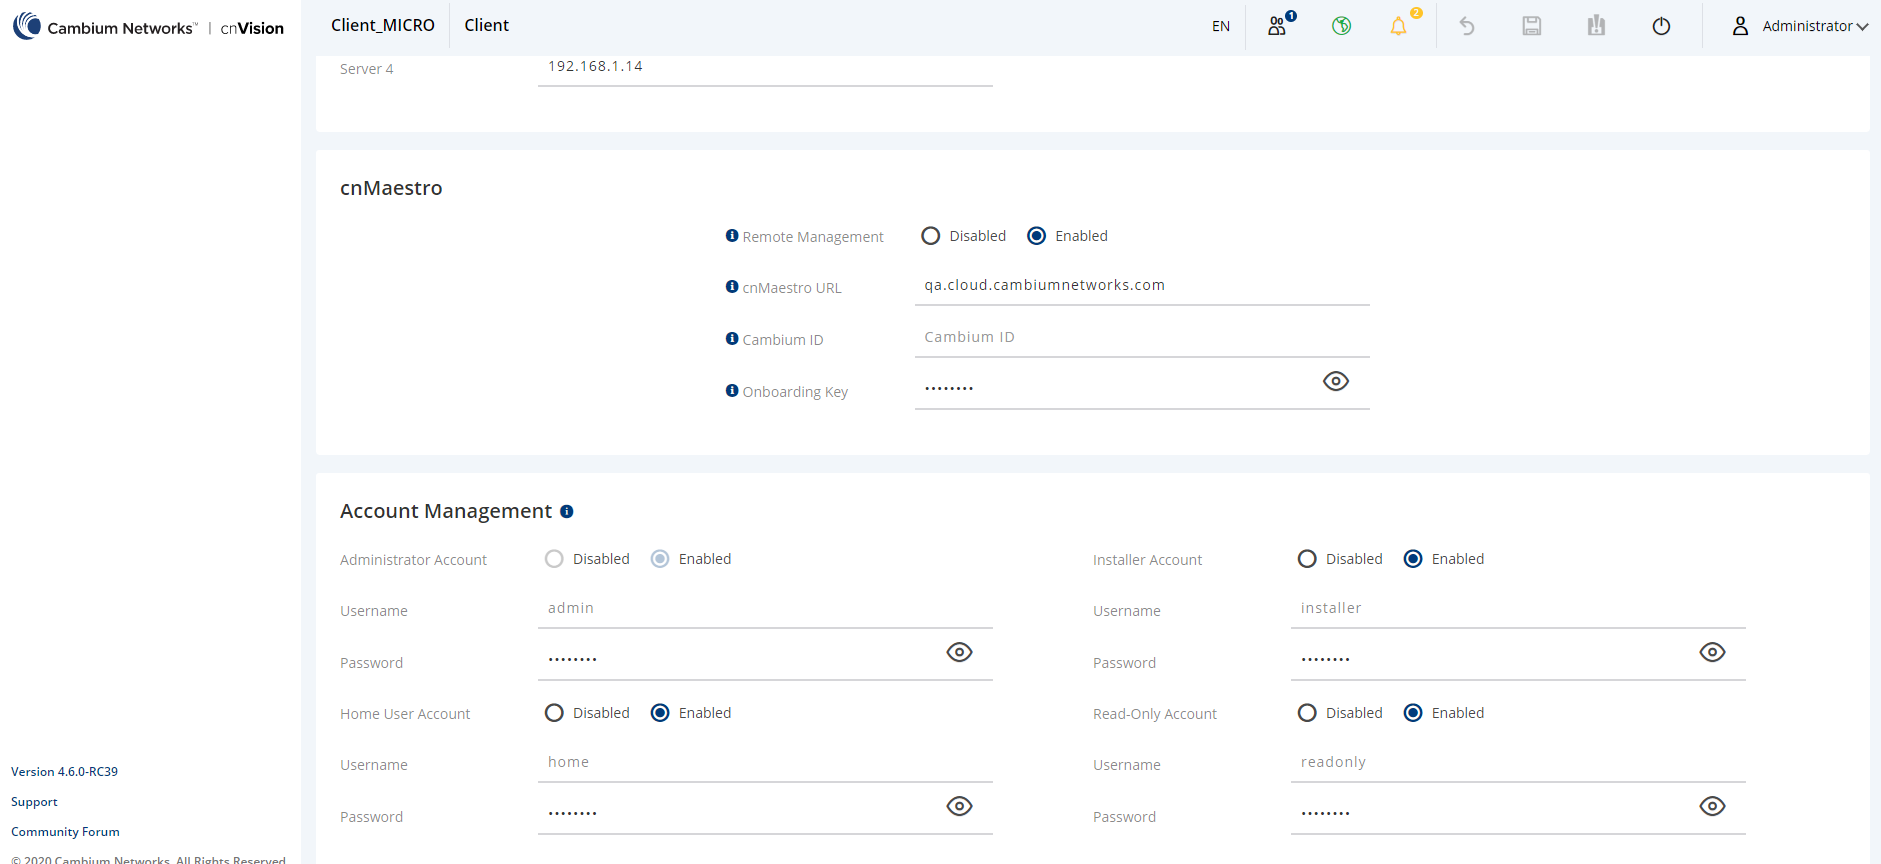
In the cnVision Client device UI,
| 1. | Navigate to Configuration > System > Device Management. |
| 2. | Under cnMaestro section, enter cnMaestro URL. |
| 3. | Click Save. |
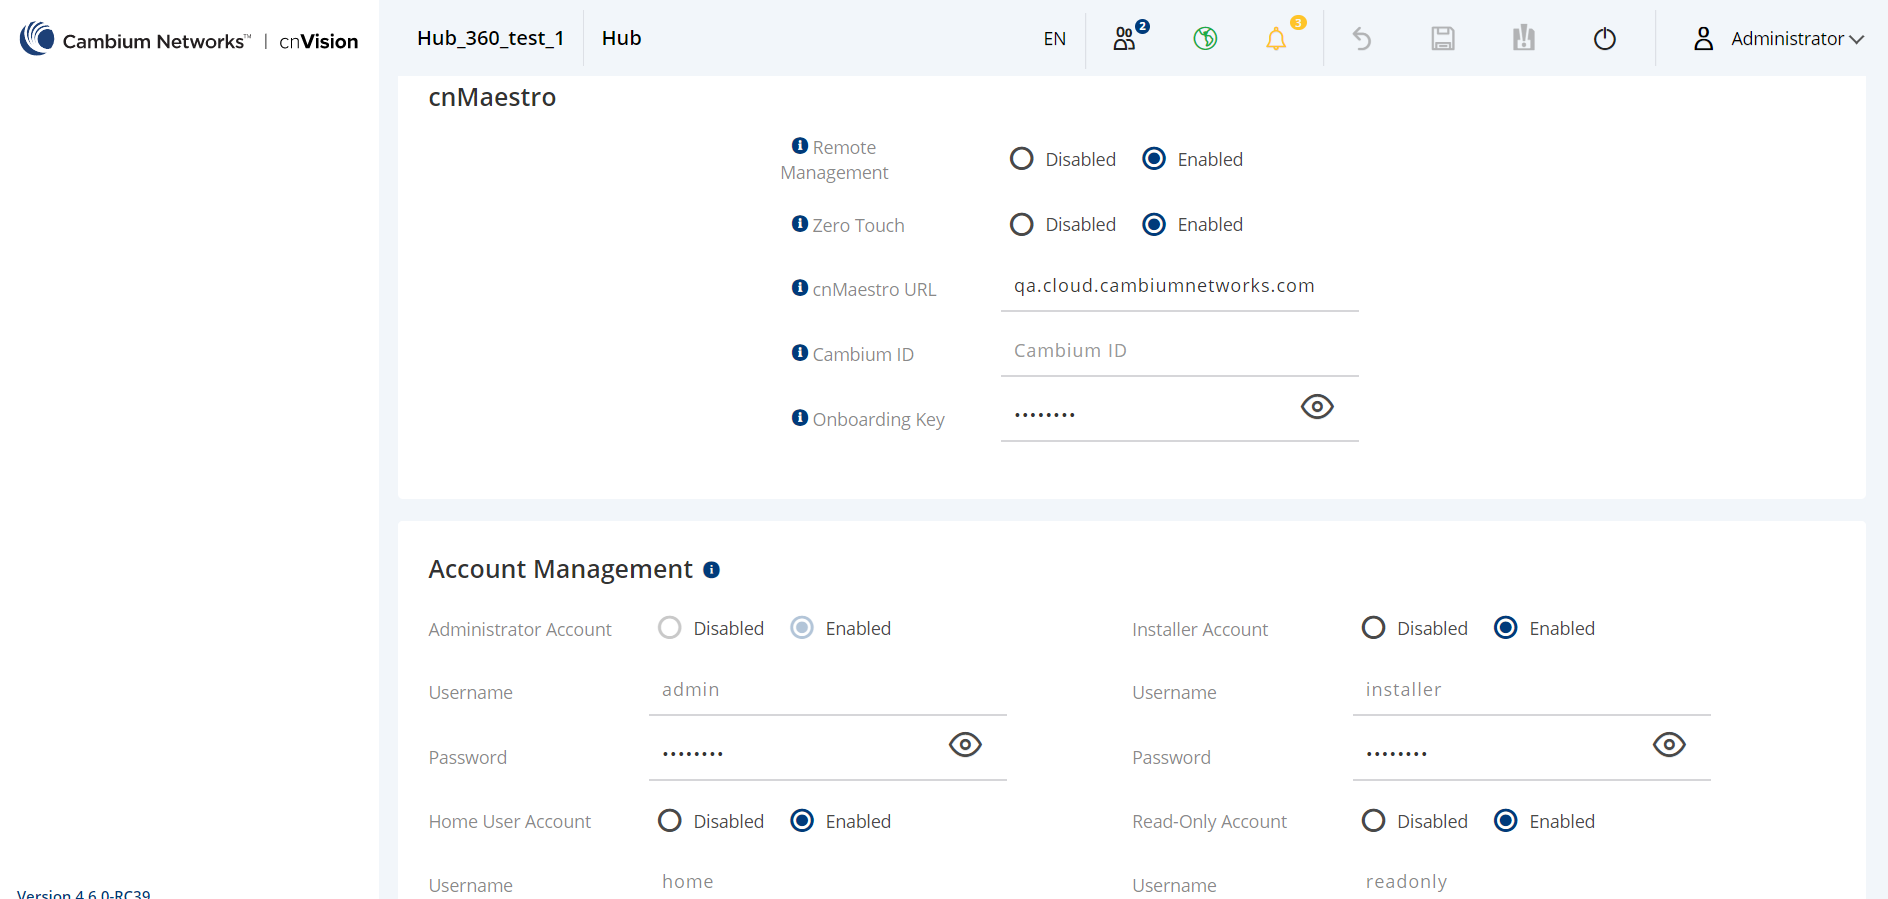
In the cnVision Hub device UI,
| 1. | Navigate to Configuration > System > Device Management. |
| 2. | Under cnMaestro section, enter cnMaestro URL. |
| 3. | Click Save. |
In the Enterprise AP device UI,
| 1. | Navigate to . |
| 2. | Scroll to . |
| 3. | Select and enter your Cambium ID and the user’s Onboarding Password. |
| 4. | Navigate to to view the status of the ePMP device connection to cnMaestro. |
Figure 4 Onboarding Enterprise AP through UI
|
|---|
To view the status of the device connection to cnMaestro:
Figure 5 Viewing the Enterprise AP connection to cnMaestro
|
|---|
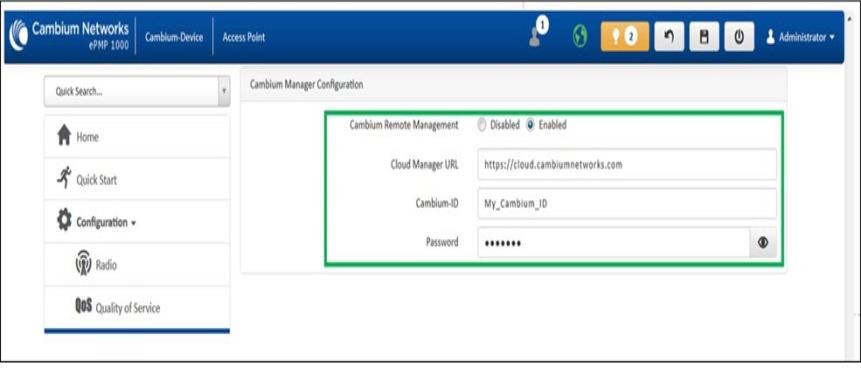
In the ePMP device UI,
| 1. | Navigate to . |
| 2. | Scroll to . |
| 3. | Select and enter your Cambium ID and the user’s Onboarding Password. |
| 4. | Navigate to to view the status of the ePMP device connection to cnMaestro. |
Figure 6 Onboarding ePMP 1000 through UI
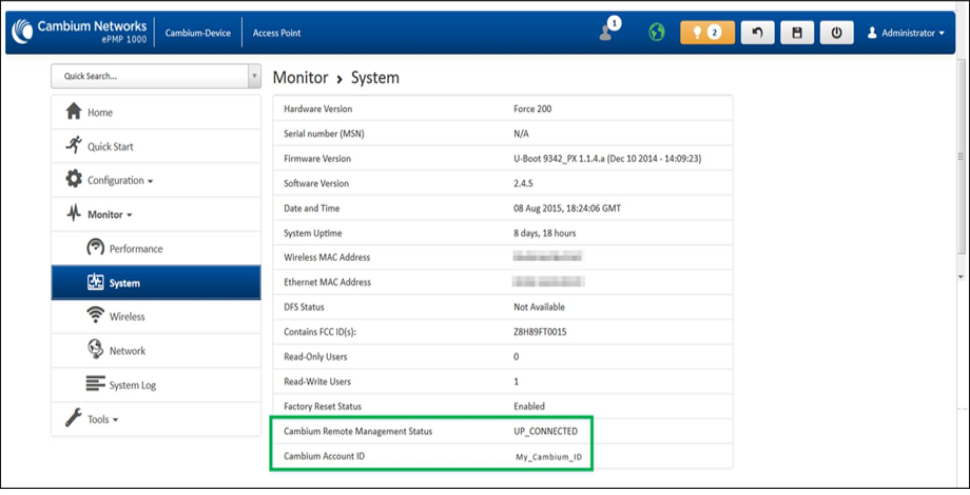
To view the status of the ePMP device connection to cnMaestro:
Figure 7 Viewing the ePMP device connection to cnMaestro
The following OIDs can be configured:
| | cambiumDeviceAgentEnable |
| | cambiumDeviceAgentCNSURL |
| | cambiumCNSDeviceAgentID |
| | cambiumCNSDeviceAgentPassword |
The following OID can be used to check the status of the device’s connection to cnMaestro.
cambiumCnsServConsStat
To onboard ePMP 1000 Hotspot device connection to cnMaestro:
Figure 8 Onboarding ePMP1000 Hotspot through UI

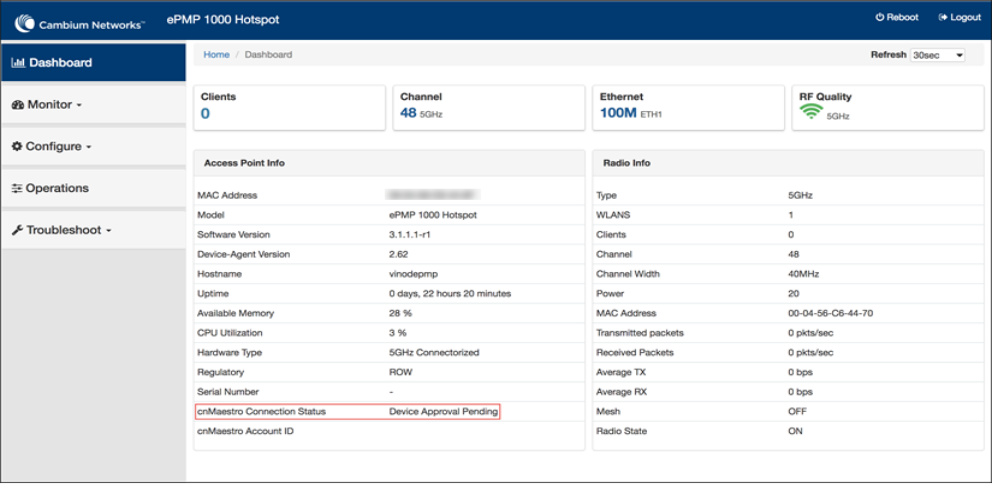
To view the status of the ePMP 1000 Hotspot device connection to cnMaestro:
Figure 9 Viewing the ePMP 1000 Hotspot device connection to cnMaestro
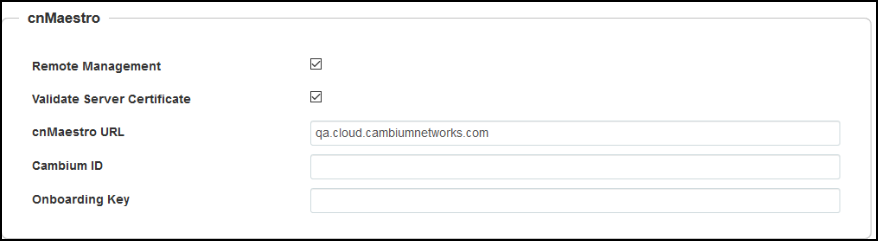
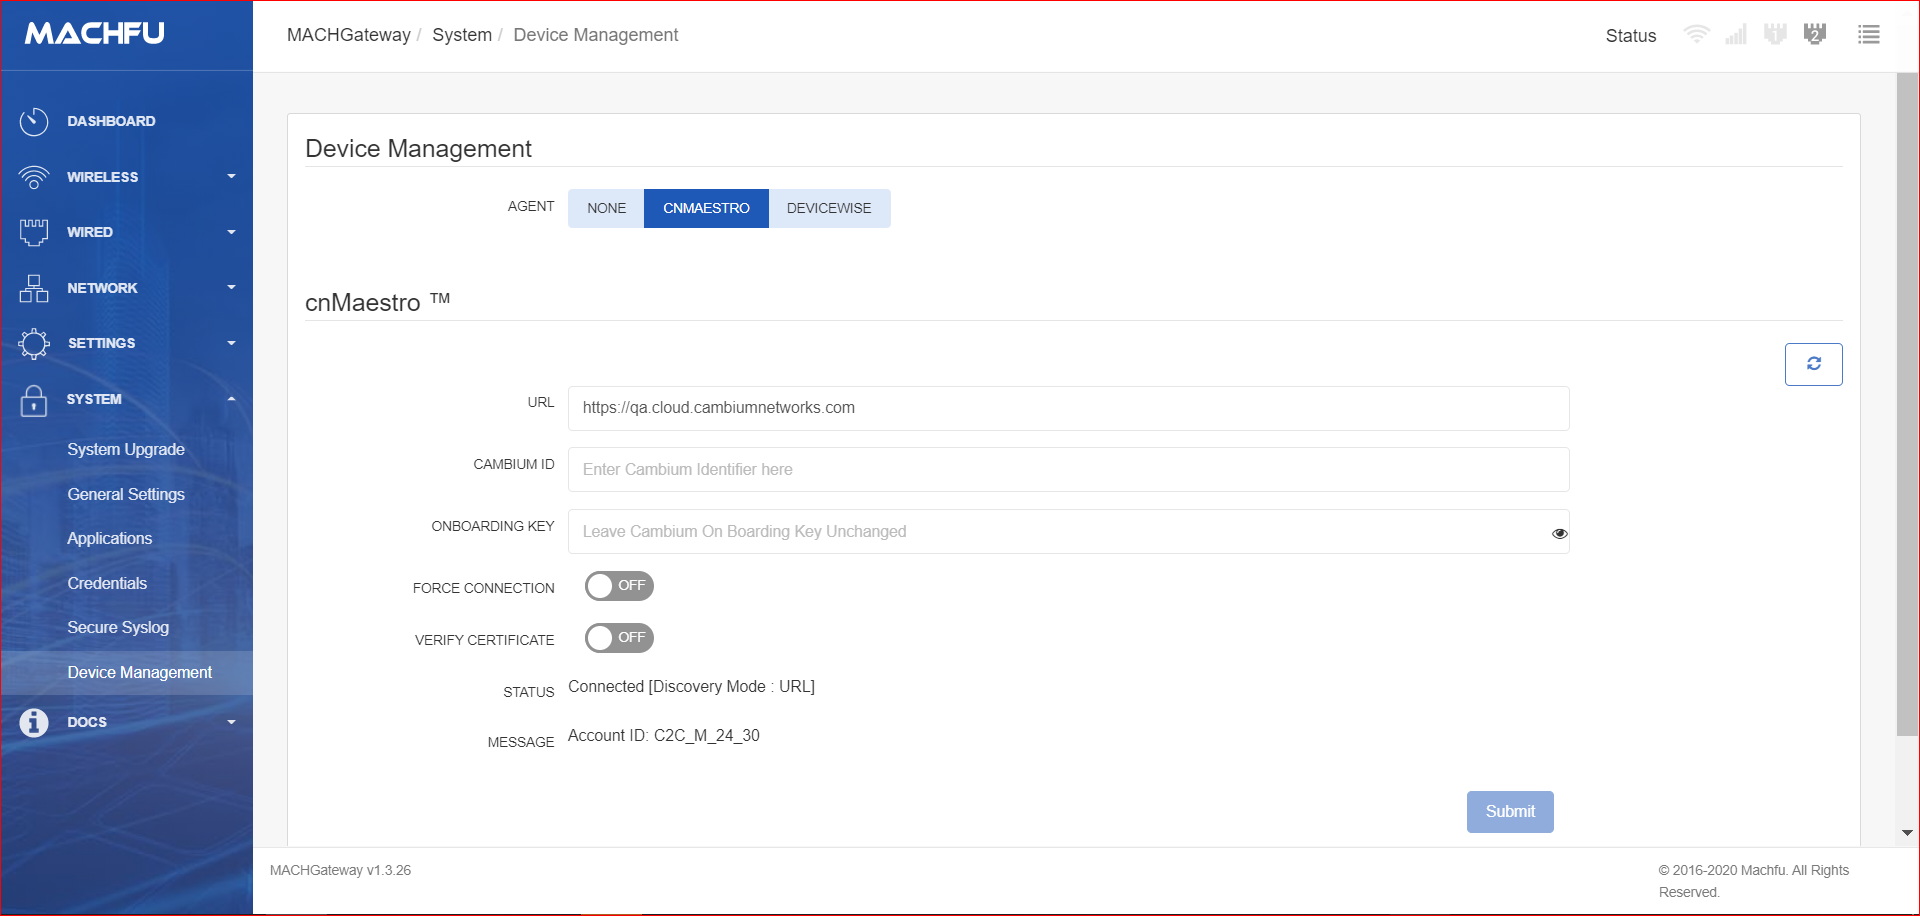
In the Machfu device UI,
| 1. | Navigate to System > Device Management. |
| 2. | Under cnMaestro section, enter cnMaestro URL. |
| 3. | Click Save. |
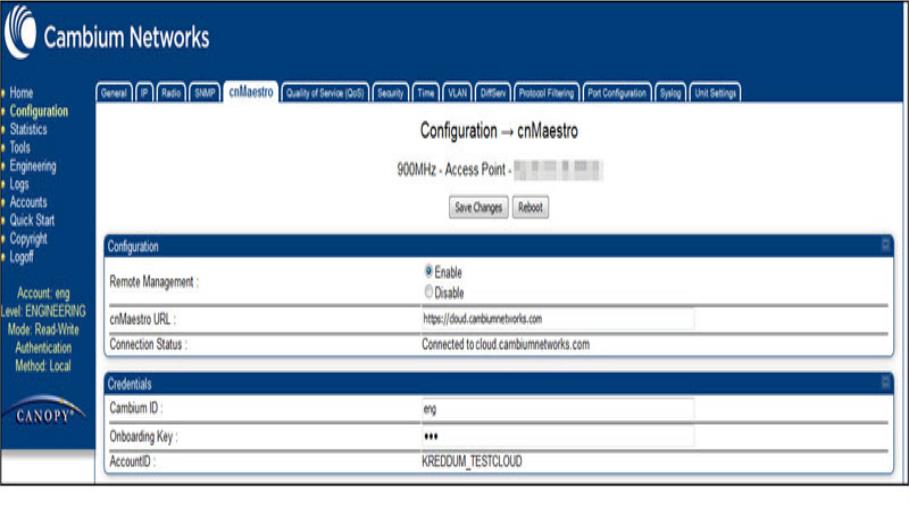
To onboard PMP device connection to cnMaestro:
In the PMP device UI,
| 1. | Navigate to . |
| 2. | Under, provide the following details: |
| a. | Select Enable under Remote Management. |
| b. | Enter the URL to connect to cnMaestro in the textbox. |
| 3. | Under , enter the in the respective textboxes. The Account ID field displays the account id of the user. |
Figure 10 Onboarding PMP through UI
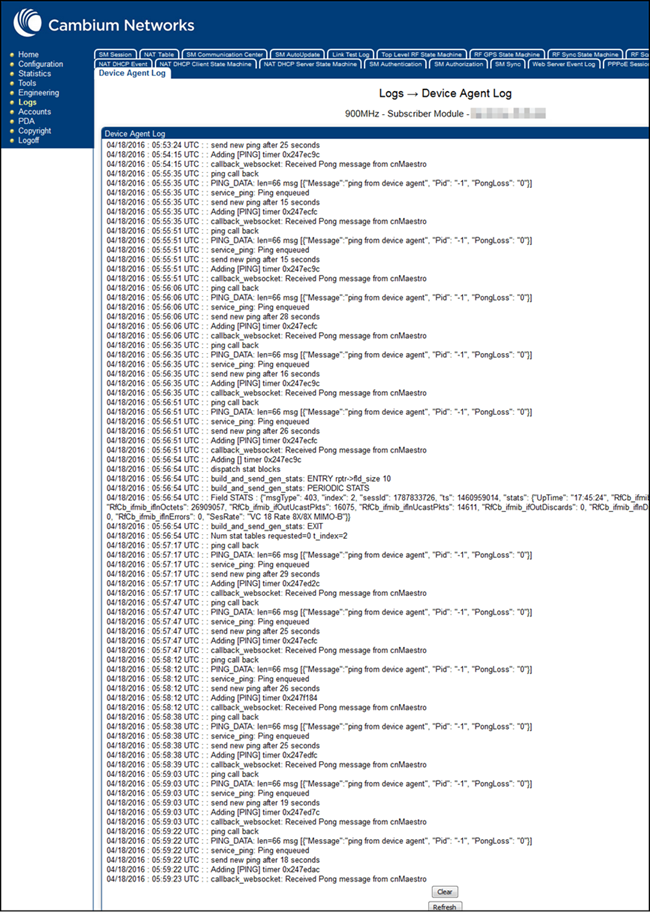
To view the logs, navigate to Logs > Device Agent Log page:
Figure 11 Viewing Logs
The following OIDs can be configured:
| | cnMaestroEnable |
| | cnMaestroUrl |
| | camID |
| | camOnboardKey |
The following OIDs can be used to check the status of the device’s connection to cnMaestro.
| | camAccID |
| | cnMaestroStatus |
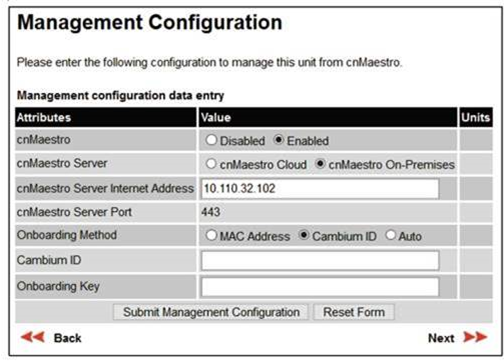
| 1. | Navigate to clickbutton. |
| 2. | In the Management Configuration window, under cnMaestro, select Enabled. |
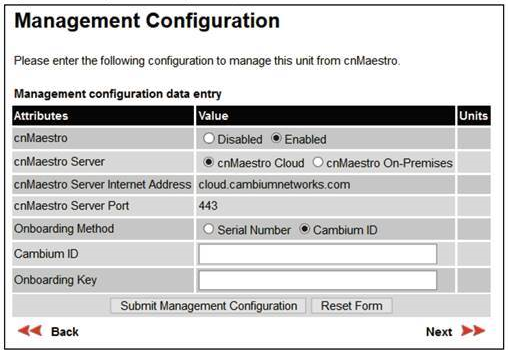
| 3. | Select cnMaestro On-Premises radio button. |
Perform the following steps to onboard Xirrus device through CLI.
| 1. | Connect to the device using any SSH tool. |
| 2. | Login as admin, the default password is admin. |
| 3. | Execute the following command in ssh console: |
#ssh admin <device IP address>
#password <admin>
#configure
#management
#cloud server cloud. cambiumnetworks.com scheme cnmaestro enable
#save
#Saving configuration...OK
#cnMaestro-onboarding id cambium_ID key onboarding_key
#save
saving configuration...OK
#show management
Cloud Management enabled Cloud Timeout 50 seconds Cloud Port 443 Cloud Retry 5 Cloud Scheme cnMaestro Cloud Server cloud. cambiumnetworks.com
Cambium ID NOTSET Cambium Key Set cnMaestro Status Not Connected
| 4. | Login to Cloud account. |
| 5. | Navigate to Home > Onboard > Devices. |
| 6. | In the Devices page, the device onboarded is shown as below: |
Figure 12
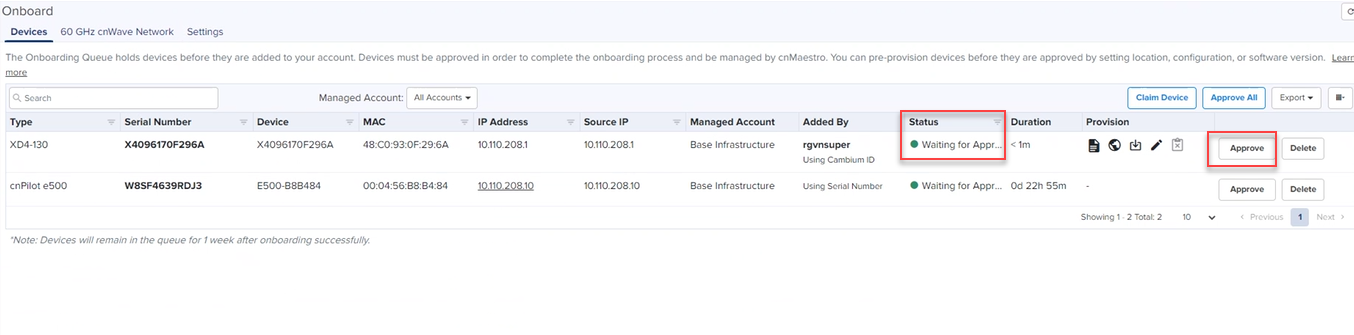
The Status field display Waiting for Approval.
It is optional to provision the device for location, software version update, and assign to an AP Group.
| 7. | Click Save. |
| 8. | Click Approve. |
For details to migrate Xirrus devices from XMS to cnMaestro X using a tool, refer to XMSE to cnMaestro X.
|
|
|
